Monday, December 12, 2011

DIY Christmas Gifts #3: Photo Coasters

These coasters were actually inspired by a gift from my friend Brenda. She made me this cute little coaster with pink and green scrapbook paper and flowers and it's been brightening up my desk since my birthday! She said it was really easy to make, but I was kind of afraid to attempt it. I mean, there's tile and polyurethane sealant. Not such a great combination for me...

But, my grandmother really loves pictures. I've given her paintings and professional photographs and frames in the past, which was great, but how could I possibly top a homemade painting? Then the answer came: coasters with pictures of my aunt and uncles on them! It's perfect! It's original, thoughtful, and absolutely adorable.

Want to know how I made them? It's not as hard as you think!


First, you will need: four tiles (you can get individual tiles at home improvement stores), Mod Podge, waterproof polyurethane sealant (available at craft stores in the paint section..yeah, it took me forever to find it), little self-stick felt circles (in the framing section, of all places), photocopied pictures, and paper of some kind to decorate the tile with.


And there's what the sealant looks like. It looks expensive, but that little bottle only cost $2! And it's lasted through 2 of these projects so far, and I think I still have over half of it left. Now what shall I use the rest of it on? Hmm...

So, it's super important that you use only smooth, thin paper for the decoration. I once tried to Mod Podge a tree onto a canvas using this really cool textured brown paper for the trunk, and not only did it refuse to stick, but it ruined my entire canvas! Lesson learned. Or was it?

By the way, it really helps if you turn over the paper, trace the tile, and then cut it out. Trying to measure and draw a straight line for the sake of pride just isn't worth it.


Now apply a base coat of Mod Podge to the clean tile. This gives the second layer something better to stick to.

Apply a second coat, and while it is still wet, press a cut out piece of scrapbook paper down until the edges don't stick up anymore. Now, I decided to make this one go all the way to the edge, because the sand color clashed with the grey. The last one I did left a small border around it, and it still looked cute. Hooray for artistic license! 

In hindsight, I wish I had gotten a thinner piece of scrapbook paper. This was one of those double-sided ones from Michael's, so it was a little thicker than usual. And boy, was that paper persnickety! Those edges just did not want to stay down. I had to keep running the handle of the foam brushes along them because they kept popping up. Seriously, you would think I had learned my lesson about fancy scrapbook paper from the tree debacle.


Once that dries, then another layer of Mod Podge goes on top. This was mainly to provide something for the pictures to stick to. Remember to add any other layers while the bottom layer of Mod Podge is still wet. Make sure you seal the last layer with a final coat of Mod Podge, making sure to get along the edges and down the sides to seal it.


Wondering who that little girl is? Yep, that is my aunt. And she hasn't changed a bit.
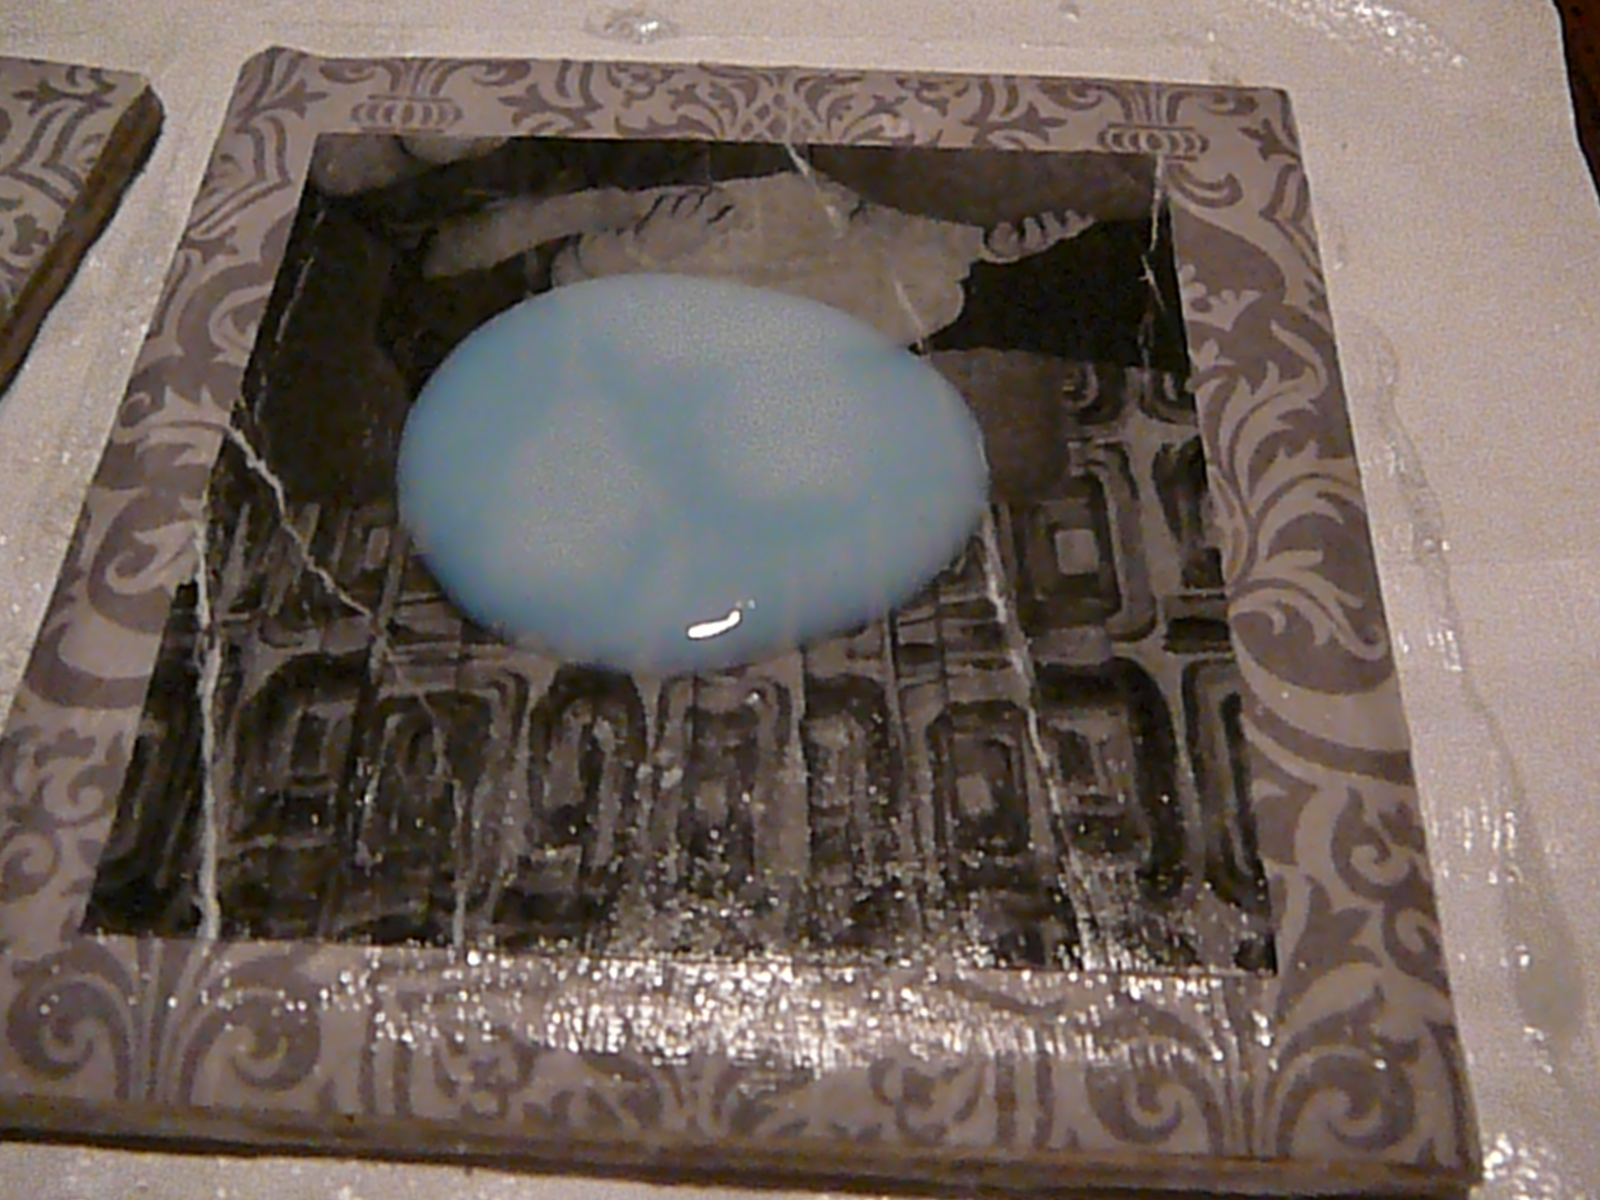

Once that's all dry, apply two coats of the polyurethane sealant. And make sure you open a window, because that stuff smells really bad. Ugh, my whole living room smelled like...well...some really strong chemical! So glad I had already eaten dinner, or I would have lost my appetite! Which, of course, would have been tragic.


And now, once everything is all dry, flip those beautiful masterpieces over and add the protective dots on all four corners. These are a hard plastic kind, but the felt circles look cute too. I just didn't use those because the only kind available was this hideous shade of green. Ugh! Remember, this step is really important, unless you want your gift to scratch your recipient's tables. Then you can skip it.

So, I'm really pleased with how these little guys turned out! They're really cute and sweet and just simply wonderful! I really hope my grandmother likes them. I made some for my mom, too, but the pictures from that aren't posted because 1) she already knows she's getting coasters, and 2) she reads my blog sometimes and I don't want her to see them before Christmas.

Monday, December 5, 2011

DIY Christmas Gifts #2: Marinade Mix

My uncle loves Asian food and cooking almost as much as I do. In fact, he runs the kitchen for the family restaurant and makes the most wonderful steak I've ever eaten in my whole life! So this Christmas I thought he would really enjoy all the ingredients to make a delicious Korean beef bulgogi marinade.

Beef bulgogi is like a salty-sweet BBQ made with flank steak. It's so deliciously wonderful and not at all spicy. Unless, of course, you put Sriracha on it. Mmm...

Taken from: The Oatmeal web comic

And that is totally how I feel about it.

Anyways, since there were several dry ingredients and only a few wet ingredients, I decided to put together all the dry ingredients in a small Pyrex bowl that my uncle could use to make custard or brule or whatever his culinary heart desires and leave the wet ingredients in their original packaging. Then I wrote down a modified recipe and wrapped everything separately. *Insert evil laugh here.* Oh, the look on his face will be priceless as he opens each part of the gift and tries to figure out what it all means! (I put the instructions on the bottom, by the way.)

Here's the complete recipe:

Beef Bulgogi
Taken from an Allrecipes.com recipe

  • 1 pound flank steak, thinly sliced
  • 5 tablespoons soy sauce
  • 2 1/2 tablespoons white sugar
  • 1/4 cup chopped green onion
  • 2 tablespoons minced garlic
  • 2 tablespoons sesame seeds
  • 2 tablespoons sesame oil
  • 1/2 teaspoon ground black pepper

  1. Place the beef in a shallow dish. Combine soy sauce, sugar, green onion, garlic, sesame seeds, sesame oil, and ground black pepper in a small bowl. Pour over beef. Cover and refrigerate for at least 1 hour or overnight.
  2. Preheat an outdoor grill for high heat, and lightly oil the grate.
  3. Quickly grill beef on hot grill until slightly charred and cooked through, 1 to 2 minutes per side.


OK, now I need to go find delicious Asian fare in my part of the city. So far I have found a worthy Thai restaurant, but only Pei Wei and several icky Asian buffets serve other kinds of Asian dishes. Soon, I shall make the trek up to H Mart, and then I can stock my pantry with boba tea bubbles, lemongrass puree, mochi, lychee, ginger candies, rice sticks, and curry pastes! Oh, and Naan bread!! 

And then my tummy will be happy again. 

Saturday, December 3, 2011

DIY Christmas Gifts #1: Mixed Media Art

As a recent college grad, I don't have tons of money to spend on fancy-schmancy gifts for my family and friends. I'm sure most of ya'll are in the same boat as me, so I'm going to spend the next several posts describing the gifts I'm making for people (but I'm not going to tell you who they're for, because some of them read this blog!) so you can give great, from-the-heart homemade gifts too.

The first gift I will be discussing is actually a birthday present for my friend Katie. I know I said I wouldn't name names, but she'll be getting this gift long before anyone reads this blog, so she's the exception. And Katie, if you are reading this, I hope you are enjoying your painting.


This painting is actually what the artists call "mixed media" because I used more than just canvas and paint to create it. This little heart is made from scrapbook paper and written on with a Sharpie.

OK, to create a similar piece, you will need: a canvas (mine was an 11" x 14" canvas from Hobby Lobby), enough scrapbook paper to cover what shape you want to make (I used two 8 1/2" x 11" pink metallic sheets), Mod Podge (shiny or matte - your preference), a ruler, a foam brush, a painter's cup (if you don't want to dip your brush in the bottle of Mod Podge) a pencil, and a Sharpie (mine was a thin line).


So I'm sorry that I don't have more pictures of the process, but I was making this late last night so it would be ready for Katie's visit today. I'll do my best to be super-descriptive, OK?

First, you will need to draw two lines on the canvas with the pencil to separate it into four equal sections. This will help you center the heart and make it all even. And don't worry, even really pale paint will cover the pencil marks...with enough coats, that is.

Next, use the pencil to draw the heart to whatever size your heart desires. I really liked the scrapbook paper, so I wanted to cover as much space as possible with it.

Paint the area outside the heart with two (or three, depending on the color and thickness of the paint) coats of acrylic paint. Since mine was a thin paint used mainly for crafts and not professional art, I needed two coats even though it was black.

While the paint dries, tear up the scrapbook paper into several small pieces. I think most of mine ended up being a little smaller then a square inch. I like to make mine all different shapes, but since they will be layered over each other, it really doesn't matter what shape you tear yours into.

Once the paint is dry, coat a small part of the canvas with the Mod Podge. Place a few pieces of scrapbook paper over the prepped spot, and work quickly, because this stuff dries really fast! Coat the scrapbook pieces and the area around them with Mod Podge and continue layering, making sure that no little corners get turned up and that all the edges are sticking to the canvas. Repeat this process until your surface is covered to your liking. You should also spread the Mod Podge to the edges of the canvas, even though you're not putting anything there, because otherwise the finished piece will look funny. Mod Podge dries clear, but it is still kind of shiny.


See what I mean by layering? It sort of looks like a mosaic.

A Sharpie will write very nicely over the Mod Podge and dry super quickly without smearing, although you will need to keep a piece of paper nearby to scribble on because sometimes the writing tip will start to fade. But don't worry! A few squiggles on a piece of paper and your Sharpie will be good as new.


I love this verse! It's such a wonderful reminder of God's love for me, and it makes me think of the dawn and all its beauty, and how God's mercies are new every morning. God's love is so true and trustworthy, and he'll never leave me or forsake me!

By the way, the verse Psalm 143:8, the NIV version.