Showing posts with label painting. Show all posts

Saturday, December 3, 2011

DIY Christmas Gifts #1: Mixed Media Art

As a recent college grad, I don't have tons of money to spend on fancy-schmancy gifts for my family and friends. I'm sure most of ya'll are in the same boat as me, so I'm going to spend the next several posts describing the gifts I'm making for people (but I'm not going to tell you who they're for, because some of them read this blog!) so you can give great, from-the-heart homemade gifts too.

The first gift I will be discussing is actually a birthday present for my friend Katie. I know I said I wouldn't name names, but she'll be getting this gift long before anyone reads this blog, so she's the exception. And Katie, if you are reading this, I hope you are enjoying your painting.


This painting is actually what the artists call "mixed media" because I used more than just canvas and paint to create it. This little heart is made from scrapbook paper and written on with a Sharpie.

OK, to create a similar piece, you will need: a canvas (mine was an 11" x 14" canvas from Hobby Lobby), enough scrapbook paper to cover what shape you want to make (I used two 8 1/2" x 11" pink metallic sheets), Mod Podge (shiny or matte - your preference), a ruler, a foam brush, a painter's cup (if you don't want to dip your brush in the bottle of Mod Podge) a pencil, and a Sharpie (mine was a thin line).


So I'm sorry that I don't have more pictures of the process, but I was making this late last night so it would be ready for Katie's visit today. I'll do my best to be super-descriptive, OK?

First, you will need to draw two lines on the canvas with the pencil to separate it into four equal sections. This will help you center the heart and make it all even. And don't worry, even really pale paint will cover the pencil marks...with enough coats, that is.

Next, use the pencil to draw the heart to whatever size your heart desires. I really liked the scrapbook paper, so I wanted to cover as much space as possible with it.

Paint the area outside the heart with two (or three, depending on the color and thickness of the paint) coats of acrylic paint. Since mine was a thin paint used mainly for crafts and not professional art, I needed two coats even though it was black.

While the paint dries, tear up the scrapbook paper into several small pieces. I think most of mine ended up being a little smaller then a square inch. I like to make mine all different shapes, but since they will be layered over each other, it really doesn't matter what shape you tear yours into.

Once the paint is dry, coat a small part of the canvas with the Mod Podge. Place a few pieces of scrapbook paper over the prepped spot, and work quickly, because this stuff dries really fast! Coat the scrapbook pieces and the area around them with Mod Podge and continue layering, making sure that no little corners get turned up and that all the edges are sticking to the canvas. Repeat this process until your surface is covered to your liking. You should also spread the Mod Podge to the edges of the canvas, even though you're not putting anything there, because otherwise the finished piece will look funny. Mod Podge dries clear, but it is still kind of shiny.


See what I mean by layering? It sort of looks like a mosaic.

A Sharpie will write very nicely over the Mod Podge and dry super quickly without smearing, although you will need to keep a piece of paper nearby to scribble on because sometimes the writing tip will start to fade. But don't worry! A few squiggles on a piece of paper and your Sharpie will be good as new.


I love this verse! It's such a wonderful reminder of God's love for me, and it makes me think of the dawn and all its beauty, and how God's mercies are new every morning. God's love is so true and trustworthy, and he'll never leave me or forsake me!

By the way, the verse Psalm 143:8, the NIV version.

Tuesday, November 22, 2011

My Favorite Things #2: Impressionist Paintings

OK, now it's time for the second installment of My Favorite Things, in which I talk about the things I love the most so my faithful readers can learn more about me and maybe even find a few new passions of their own. Ready? Here we go!

The impressionist movement in art is by far my favorite. Everything is so abstract, but it's still clear what the artist was trying to represent (not like modern art...I mean, come on, colored squares and blobs are not a suitable self-portrait unless you happen to be an alien). Lines are blurred, colors blend into one another, and reality becomes hard to tell from dreams. Some paintings look like you're viewing them through a rain-covered window, which just makes me so very happy, because I like rain when I can be inside listening to it patter on the roof.

Ok, here's one I actually read about in a book by one of my favorite authors, Laura Jensen Walker, about a woman who goes to Paris and sees this painting of a woman with a green umbrella. I was intrigued by the way the author describes the character's enthrallment with this painting, and how it inspired her to start painting again. It made me want to see this painting that obviously had an effect on the author, since she wrote so eloquently about it.

Source: ibiblio.org
And just look at it! How could you not be enraptured with this woman? She stares at me like she can actually see me. The look on her face seems so sad, like she is leaving her best friend behind and will never see her again.

The next one was actually my introduction to impressionism. I saw it in an article about a traveling exhibition from the Art Institute of Chicago that would be in my local art museum for several weeks. It gripped my imagination, so I simply had to go see the whole exhibition. Then I was hooked, and I've been an art lover ever since.

Source: Art Institute of Chicago
She seems so dainty and feminine, with her head turned slightly away from the viewer. It's like we're sneaking up on her to surprise her with flowers or something. 

This is another one I saw at that exhibition. It was definitely one of my favorites from that day. The colors are so incredibly vivid, and the layers were very, very thick. I was impressed with the depth of detail and the incredible skill of the painter.

Source: Art Institute of Chicago

She seems so wistful...I also really love the background of trees, vines, and water. Oh, the outdoors! They call to me with a siren song I wouldn't be able to resist if it weren't so very cold outside.

And on that note, I found this gem while perusing Google images for my green umbrella painting.

Source: News on Art
Red poppies, a field, and trees. What more can a girl ask for? 

Well, I hope you all have enjoyed this little survey of impressionism. And no, I am not going to tell you who the artists are. Anything worth knowing is worth searching out. 

And with that bit of wisdom, I bid you all goodbye. I made some pumpkin spice cupcakes for Thanksgiving, and I must go do some quality control...

Saturday, October 29, 2011

Painting Project

Several months ago, I started writing my favorite lines from certain worship songs that have been stuck in my head for quite some time on my mirror. Eventually I added a few drawings and ended up with a creation that took up my entire mirror. Granted, it was a little one over the sink in my dorm room, but still.

I decided to paint my mirror creation onto a small canvas, so I could have color and stuff (and so the steam wouldn't destroy it). I tried to make a mottled background with my favorite colors: pink, blue, purple, and green. But, I am a novice painter, and haven't quite figured out how to blend colors together, so I ended up with this:


Definitely NOT what I saw in my head.

This sat in my painting box for many months, until I came across this blog entry. I thought it would be a perfect solution to my botched project!

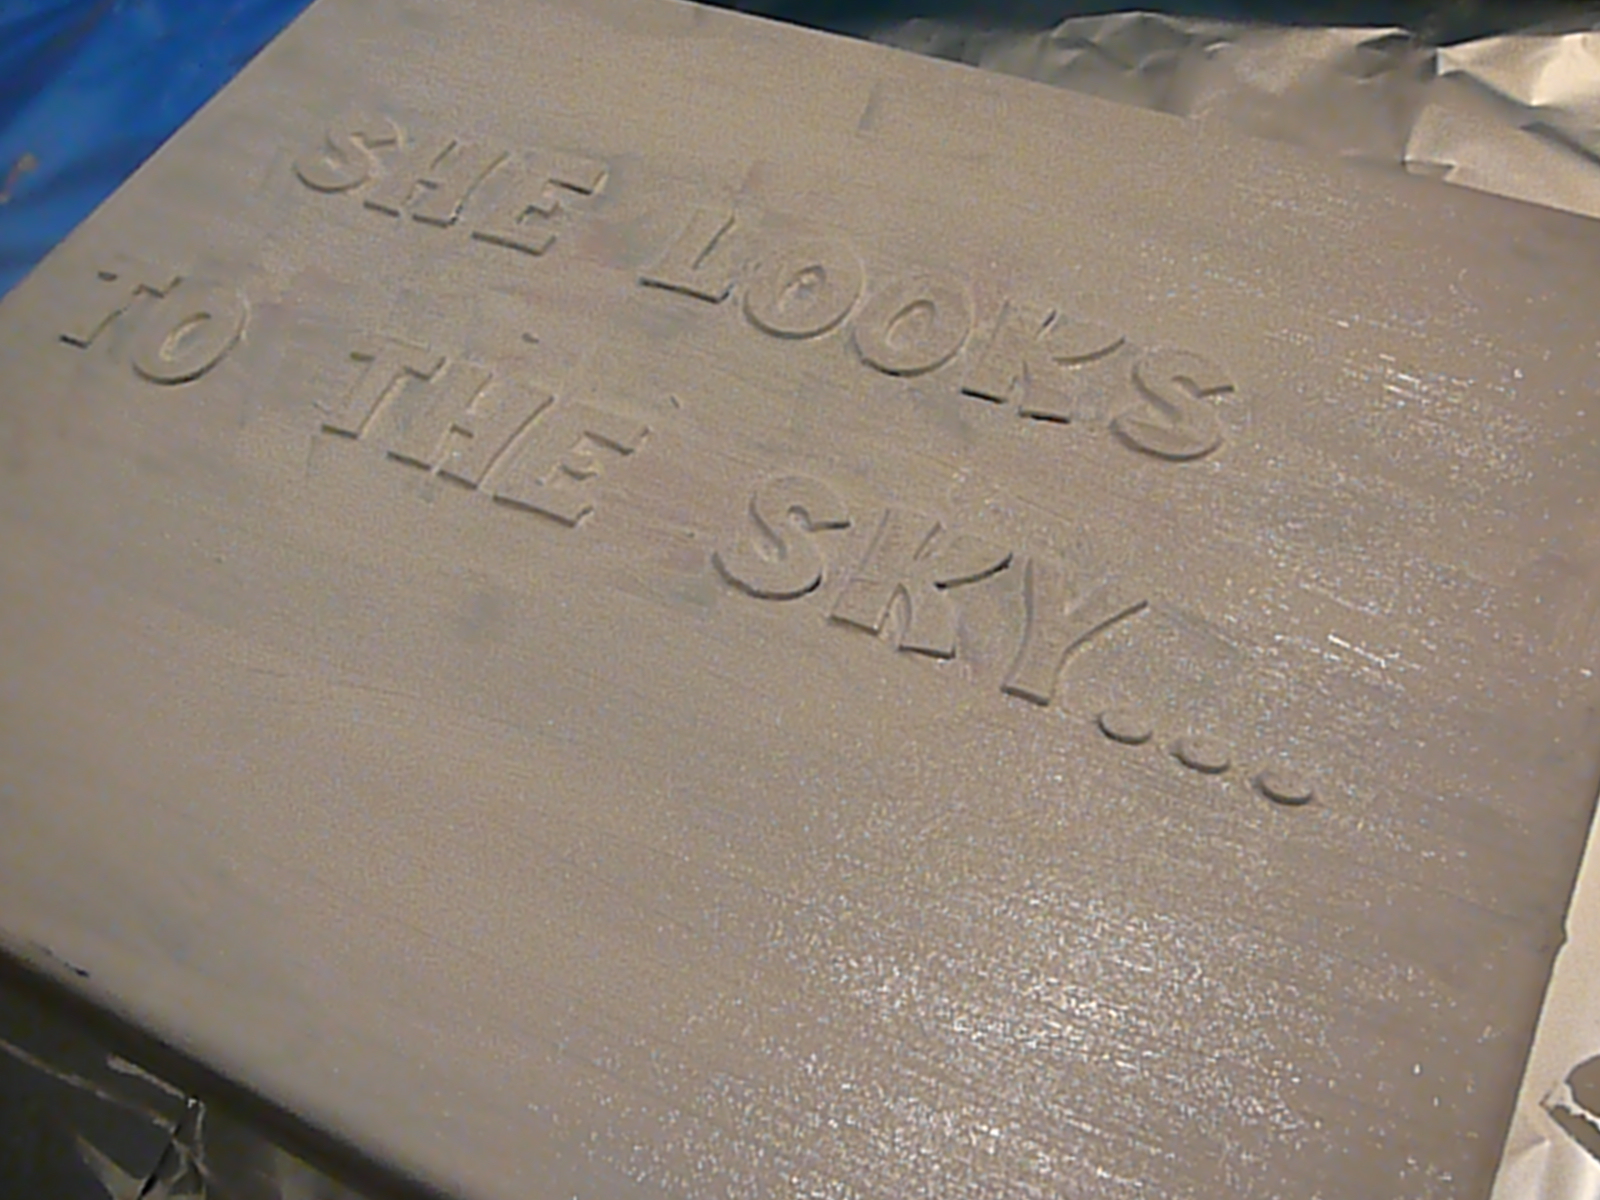
So, I bought some white foam stickers and did this:


If you will recall from my first post, this is the name of one of my favorite songs by Sherri Youngward. It was the inspiration for my original mirror art, so it's what I chose for this project.

I got my art supplies ready:


I like acrylic paint. It's a lot easier to use than oil paint (and less messy!) and thicker than watercolor. Plus it dries fast, which keeps me from getting antsy. Perfect for a beginning painter!

I used long brushstrokes to paint a nice thick layer of the white paint over my canvas and foam stickers, making sure to get in all the little crevices and not let the paint build up along the sides of the stickers.


When I was finished with the first layer, it looked like this:


I then painted another layer and waited (somewhat impatiently, I'm afraid) for the canvas to dry. I even made candy corn cupcakes for my Halloween party this evening to keep myself from going crazy with anticipation. 


These are so pretty, they might just get their own post!


I just couldn't take it; I had to eat one! It was calling my name, begging me to bite into the deliciousness. How could I resist?

Anywho, my painting finally dried enough to where I could peel back the stickers, and this is what I got:


A tad bit messy, but I don't think anyone will really notice. And it looks so much nicer than the original project! I'm so excited! I can't wait to display this in my newly decorated apartment.