Tuesday, December 27, 2011

My Favorite Things #3: Animals & Such

You knew this post was coming, right? It's inevitable. I mean, I'm a girl and I like baking and crafts, so it naturally follows that I will also like animals. And that I just might want to write about them. But don't worry, this isn't a post full of gushing about how cute puppies are or how wonderful (ha!) kitties are (I definitely do NOT want to put them in a basket). This is a post about some unusual, but awesome, animals you may not have known existed that also happen to be adorable. And then there are puppies.

So all you guys who read my blog, you have been warned. Leave now if you don't want to lose man points.

Ready? Here we go!

#1: Penguins

From: Animal Planet

Look at them!! They're so incredibly adorable! I think they're hilarious when they walk around with their wings thrown out behind them like they're pretending they have capes. It's great!

By the way, these are the Adelie penguins, one of the smaller breeds. They're my favorite breed.

From: A Boston Girly at Heart
Awww, penguin love! Also, if you click on the link you can see more adorable pictures of penguins being all lovey-dovey.

Did you know penguins mate for life? Another reason to love them!

#2: Chinchillas


Chinchillas are adorable! They have fluffy long tails and super soft fur. I first saw one in a PetsMart when I was in high school and fell in love with their cuddlyness. I've wanted one ever since, but have never really been in a position to buy one. But soon, soon I shall have a chinchilla.

Disclaimer: Chinchillas require a lot of TLC, and can be difficult for some people to take care of. Please do your research and don't buy a chinchilla unless you think you can devote the time and care they need. Deal?

#3: Pygmy Rabbits


Ok, you might need to sit down for this one, because the cuteness might just knock you over. It's a bunny that can fit in the palm of your hand. 


From: Analik

Awww!!! Look at those little ears!! And little paws!! And the whiskers!!!

Ah hem, excuse me, I forgot myself.

Anyways, I've loved rabbits ever since I was a little girl. I had this little stuffed rabbit that I named Henrietta when I was 5. Don't ask me where I got that name...I was a rather strange child.

FYI: Pygmy rabbits are an endangered species native to the Columbia Basin of the northwestern United States. With only 16 adults left in 2001, they were taken into captivity in an attempt to boost their numbers and have been reintroduced little by little. The people at Washington State University just about squealed for joy when they found several litters in the wild in 2007. These little guys are making a comeback!

#4: Puppies


Yeah, you knew it was coming. What list of cute animals would be complete without puppies? They're the epitome of fun, playful cuddlyness and no small child can resist their charm.

From: Cute Puppies for Sale

No post about puppies would be complete without a weenie dog! They have those cute little short legs that make them look like they're leaping as they run. Seriously, I empathize with those little guys. My legs are short, too. 

From: Beagle Dog Training Tips

My first dog was a little beagle puppy. I was 5, and I named him Charlie after the main character in All Dogs Go to Heaven. I loved that movie when I was a little girl! Well, we had to give Charlie away when we moved because we didn't know whether the new yard would be big enough for him. I sometimes still miss the little guy. He was a good puppy.


Well, I think that's enough cuteness for one post. I'm going to go research chinchilla care...

Wednesday, December 21, 2011

DIY Christmas Gifts #5: Munchies

This one goes out to all you last-minute shoppers who wait until December 21 or later to buy gifts. The lines in the stores are going to be insane from now on, so running to the local big box retailer for a light-up reindeer Christmas sweater is not a viable option. What to do? What to do?

Here's a solution that is both easy and cheap: make baked goodies! Package them in cellophane bags (available at Hobby Lobby, my go-to store, in the party section), close them with metallic twist ties (in the cake decorating section of Hobby Lobby) and use curling ribbon to finish it off. Attach some homemade labels and you have a super cute, super simple, super cheap gift that you can make in mass batches for last-minute hostess gifts or stocking stuffers.

Here are a few of my favorites that I have made in the past for friends:

Source: Betty Crocker
Puppy Chow: always a hit. Perhaps it should be called Reindeer Chow in light of the holiday season...


Source: Allrecipes.com
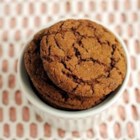
Gingerbread that you can actually chew! These cookies were a big hit with my coworker who claims not to like gingerbread. That's because he's used to the thin, hard, crispy cookies that people normally make, and these are actually soft.


Source: Brown Eyed Baker
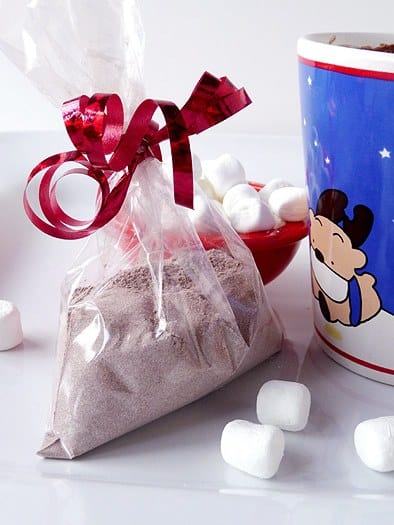
Hot chocolate mix. Customize with crushed candy canes or different kinds of chocolate. You can also add the same spices used in the gingerbread cookie recipe and substitute brown sugar for white sugar. 


Source: Bakerella
Red velvet cake balls. I once made 2 batches for a small get-together and left with empty serving platters!


Source: Allrecipes.com
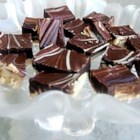
Tiger butter. This is actually something my old high school friend would make every year. Watch out: it's addicting!


Monday, December 19, 2011

DIY Christmas Gifts #4: Heart Handwarmers

OK, so this is a great gift to make in bulk as stocking stuffers for family and friends. They're really quick and easy to make, and the material is usually on sale around this time of year. I found mine at Hobby Lobby (yay 40% off coupon!). Plus, a yard will give you enough for at least 10 people. Score!

You will need fleece, thread, needles and pins, scissors, rice, and a funnel.

Layer two pieces of fleece and cut into a square that is about 1 1/2 times the size of your palm.


Fold the two squares in half and cut a half heart out of the side with the fold. Remember when you were in elementary school and you made hearts in arts and crafts? Yeah, it's like that.


And when you've got your heart all done, make sure you pin the sides so it doesn't move around while you're sewing.


Three pins works just fine for this little heart.


And if you cut anything like me, you'll need to trim the edges to make them line up.


Now thread your needle, and tie about 3 knots in it (the fleece is more stretchy than most fabrics, so you have to tie more knots to keep it from pulling through). Start sewing the two pieces together with a whip stitch along the edge. A whip stitch, for you novice seamstresses (or seamsters, I suppose), is a really easy, basic stitch often used to close a hem. You insert the needle from one side of the fabric to the other at the edge, then bring the needle around to the exact same side and repeat the motion until you run out of thread or have to tie off. (And before you start thinking that I am an accomplished seamstress, I had to look this up to provide a tutorial because I didn't know the proper terms!)


Keep going until you have a small opening that you can use to turn the heart inside out.


Now turn the heart inside out and go get your rice. I used jasmine rice because I'm hoping that when it's heated up, it will smell nice.


Use a funnel to put enough rice to fill the heart, but leave enough room that the rice can move freely. It should feel more like a beanbag and less like a hackey sack.

Fold over the opening and use the whip stitch to close it off.


And there you go! A cute little heart handwarmer that will smell like jasmine (I hope) when it's warmed up.

Side note: make sure you don't overheat the rice, or it will stop warming up. My powerful microwave warms it up nicely at 1 minute 30 seconds.

Can't you just see putting this in a little stocking on your mantle? It's just so precious! I can't wait to give them to the fam!

Monday, December 12, 2011

DIY Christmas Gifts #3: Photo Coasters

These coasters were actually inspired by a gift from my friend Brenda. She made me this cute little coaster with pink and green scrapbook paper and flowers and it's been brightening up my desk since my birthday! She said it was really easy to make, but I was kind of afraid to attempt it. I mean, there's tile and polyurethane sealant. Not such a great combination for me...

But, my grandmother really loves pictures. I've given her paintings and professional photographs and frames in the past, which was great, but how could I possibly top a homemade painting? Then the answer came: coasters with pictures of my aunt and uncles on them! It's perfect! It's original, thoughtful, and absolutely adorable.

Want to know how I made them? It's not as hard as you think!


First, you will need: four tiles (you can get individual tiles at home improvement stores), Mod Podge, waterproof polyurethane sealant (available at craft stores in the paint section..yeah, it took me forever to find it), little self-stick felt circles (in the framing section, of all places), photocopied pictures, and paper of some kind to decorate the tile with.


And there's what the sealant looks like. It looks expensive, but that little bottle only cost $2! And it's lasted through 2 of these projects so far, and I think I still have over half of it left. Now what shall I use the rest of it on? Hmm...

So, it's super important that you use only smooth, thin paper for the decoration. I once tried to Mod Podge a tree onto a canvas using this really cool textured brown paper for the trunk, and not only did it refuse to stick, but it ruined my entire canvas! Lesson learned. Or was it?

By the way, it really helps if you turn over the paper, trace the tile, and then cut it out. Trying to measure and draw a straight line for the sake of pride just isn't worth it.


Now apply a base coat of Mod Podge to the clean tile. This gives the second layer something better to stick to.

Apply a second coat, and while it is still wet, press a cut out piece of scrapbook paper down until the edges don't stick up anymore. Now, I decided to make this one go all the way to the edge, because the sand color clashed with the grey. The last one I did left a small border around it, and it still looked cute. Hooray for artistic license! 

In hindsight, I wish I had gotten a thinner piece of scrapbook paper. This was one of those double-sided ones from Michael's, so it was a little thicker than usual. And boy, was that paper persnickety! Those edges just did not want to stay down. I had to keep running the handle of the foam brushes along them because they kept popping up. Seriously, you would think I had learned my lesson about fancy scrapbook paper from the tree debacle.


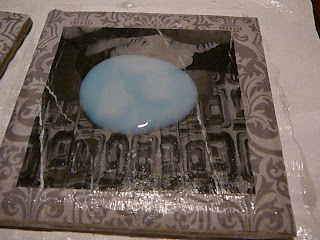
Once that dries, then another layer of Mod Podge goes on top. This was mainly to provide something for the pictures to stick to. Remember to add any other layers while the bottom layer of Mod Podge is still wet. Make sure you seal the last layer with a final coat of Mod Podge, making sure to get along the edges and down the sides to seal it.


Wondering who that little girl is? Yep, that is my aunt. And she hasn't changed a bit.


Once that's all dry, apply two coats of the polyurethane sealant. And make sure you open a window, because that stuff smells really bad. Ugh, my whole living room smelled like...well...some really strong chemical! So glad I had already eaten dinner, or I would have lost my appetite! Which, of course, would have been tragic.


And now, once everything is all dry, flip those beautiful masterpieces over and add the protective dots on all four corners. These are a hard plastic kind, but the felt circles look cute too. I just didn't use those because the only kind available was this hideous shade of green. Ugh! Remember, this step is really important, unless you want your gift to scratch your recipient's tables. Then you can skip it.

So, I'm really pleased with how these little guys turned out! They're really cute and sweet and just simply wonderful! I really hope my grandmother likes them. I made some for my mom, too, but the pictures from that aren't posted because 1) she already knows she's getting coasters, and 2) she reads my blog sometimes and I don't want her to see them before Christmas.

Monday, December 5, 2011

DIY Christmas Gifts #2: Marinade Mix

My uncle loves Asian food and cooking almost as much as I do. In fact, he runs the kitchen for the family restaurant and makes the most wonderful steak I've ever eaten in my whole life! So this Christmas I thought he would really enjoy all the ingredients to make a delicious Korean beef bulgogi marinade.

Beef bulgogi is like a salty-sweet BBQ made with flank steak. It's so deliciously wonderful and not at all spicy. Unless, of course, you put Sriracha on it. Mmm...

Taken from: The Oatmeal web comic

And that is totally how I feel about it.

Anyways, since there were several dry ingredients and only a few wet ingredients, I decided to put together all the dry ingredients in a small Pyrex bowl that my uncle could use to make custard or brule or whatever his culinary heart desires and leave the wet ingredients in their original packaging. Then I wrote down a modified recipe and wrapped everything separately. *Insert evil laugh here.* Oh, the look on his face will be priceless as he opens each part of the gift and tries to figure out what it all means! (I put the instructions on the bottom, by the way.)

Here's the complete recipe:

Beef Bulgogi
Taken from an Allrecipes.com recipe

  • 1 pound flank steak, thinly sliced
  • 5 tablespoons soy sauce
  • 2 1/2 tablespoons white sugar
  • 1/4 cup chopped green onion
  • 2 tablespoons minced garlic
  • 2 tablespoons sesame seeds
  • 2 tablespoons sesame oil
  • 1/2 teaspoon ground black pepper

  1. Place the beef in a shallow dish. Combine soy sauce, sugar, green onion, garlic, sesame seeds, sesame oil, and ground black pepper in a small bowl. Pour over beef. Cover and refrigerate for at least 1 hour or overnight.
  2. Preheat an outdoor grill for high heat, and lightly oil the grate.
  3. Quickly grill beef on hot grill until slightly charred and cooked through, 1 to 2 minutes per side.


OK, now I need to go find delicious Asian fare in my part of the city. So far I have found a worthy Thai restaurant, but only Pei Wei and several icky Asian buffets serve other kinds of Asian dishes. Soon, I shall make the trek up to H Mart, and then I can stock my pantry with boba tea bubbles, lemongrass puree, mochi, lychee, ginger candies, rice sticks, and curry pastes! Oh, and Naan bread!! 

And then my tummy will be happy again. 

Saturday, December 3, 2011

DIY Christmas Gifts #1: Mixed Media Art

As a recent college grad, I don't have tons of money to spend on fancy-schmancy gifts for my family and friends. I'm sure most of ya'll are in the same boat as me, so I'm going to spend the next several posts describing the gifts I'm making for people (but I'm not going to tell you who they're for, because some of them read this blog!) so you can give great, from-the-heart homemade gifts too.

The first gift I will be discussing is actually a birthday present for my friend Katie. I know I said I wouldn't name names, but she'll be getting this gift long before anyone reads this blog, so she's the exception. And Katie, if you are reading this, I hope you are enjoying your painting.


This painting is actually what the artists call "mixed media" because I used more than just canvas and paint to create it. This little heart is made from scrapbook paper and written on with a Sharpie.

OK, to create a similar piece, you will need: a canvas (mine was an 11" x 14" canvas from Hobby Lobby), enough scrapbook paper to cover what shape you want to make (I used two 8 1/2" x 11" pink metallic sheets), Mod Podge (shiny or matte - your preference), a ruler, a foam brush, a painter's cup (if you don't want to dip your brush in the bottle of Mod Podge) a pencil, and a Sharpie (mine was a thin line).


So I'm sorry that I don't have more pictures of the process, but I was making this late last night so it would be ready for Katie's visit today. I'll do my best to be super-descriptive, OK?

First, you will need to draw two lines on the canvas with the pencil to separate it into four equal sections. This will help you center the heart and make it all even. And don't worry, even really pale paint will cover the pencil marks...with enough coats, that is.

Next, use the pencil to draw the heart to whatever size your heart desires. I really liked the scrapbook paper, so I wanted to cover as much space as possible with it.

Paint the area outside the heart with two (or three, depending on the color and thickness of the paint) coats of acrylic paint. Since mine was a thin paint used mainly for crafts and not professional art, I needed two coats even though it was black.

While the paint dries, tear up the scrapbook paper into several small pieces. I think most of mine ended up being a little smaller then a square inch. I like to make mine all different shapes, but since they will be layered over each other, it really doesn't matter what shape you tear yours into.

Once the paint is dry, coat a small part of the canvas with the Mod Podge. Place a few pieces of scrapbook paper over the prepped spot, and work quickly, because this stuff dries really fast! Coat the scrapbook pieces and the area around them with Mod Podge and continue layering, making sure that no little corners get turned up and that all the edges are sticking to the canvas. Repeat this process until your surface is covered to your liking. You should also spread the Mod Podge to the edges of the canvas, even though you're not putting anything there, because otherwise the finished piece will look funny. Mod Podge dries clear, but it is still kind of shiny.


See what I mean by layering? It sort of looks like a mosaic.

A Sharpie will write very nicely over the Mod Podge and dry super quickly without smearing, although you will need to keep a piece of paper nearby to scribble on because sometimes the writing tip will start to fade. But don't worry! A few squiggles on a piece of paper and your Sharpie will be good as new.


I love this verse! It's such a wonderful reminder of God's love for me, and it makes me think of the dawn and all its beauty, and how God's mercies are new every morning. God's love is so true and trustworthy, and he'll never leave me or forsake me!

By the way, the verse Psalm 143:8, the NIV version.

Tuesday, November 22, 2011

My Favorite Things #2: Impressionist Paintings

OK, now it's time for the second installment of My Favorite Things, in which I talk about the things I love the most so my faithful readers can learn more about me and maybe even find a few new passions of their own. Ready? Here we go!

The impressionist movement in art is by far my favorite. Everything is so abstract, but it's still clear what the artist was trying to represent (not like modern art...I mean, come on, colored squares and blobs are not a suitable self-portrait unless you happen to be an alien). Lines are blurred, colors blend into one another, and reality becomes hard to tell from dreams. Some paintings look like you're viewing them through a rain-covered window, which just makes me so very happy, because I like rain when I can be inside listening to it patter on the roof.

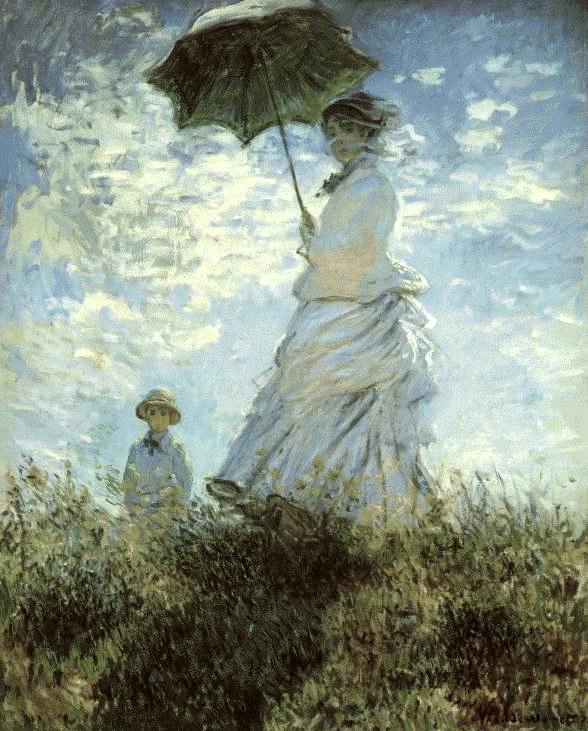
Ok, here's one I actually read about in a book by one of my favorite authors, Laura Jensen Walker, about a woman who goes to Paris and sees this painting of a woman with a green umbrella. I was intrigued by the way the author describes the character's enthrallment with this painting, and how it inspired her to start painting again. It made me want to see this painting that obviously had an effect on the author, since she wrote so eloquently about it.

Source: ibiblio.org
And just look at it! How could you not be enraptured with this woman? She stares at me like she can actually see me. The look on her face seems so sad, like she is leaving her best friend behind and will never see her again.

The next one was actually my introduction to impressionism. I saw it in an article about a traveling exhibition from the Art Institute of Chicago that would be in my local art museum for several weeks. It gripped my imagination, so I simply had to go see the whole exhibition. Then I was hooked, and I've been an art lover ever since.

Source: Art Institute of Chicago
She seems so dainty and feminine, with her head turned slightly away from the viewer. It's like we're sneaking up on her to surprise her with flowers or something. 

This is another one I saw at that exhibition. It was definitely one of my favorites from that day. The colors are so incredibly vivid, and the layers were very, very thick. I was impressed with the depth of detail and the incredible skill of the painter.

Source: Art Institute of Chicago

She seems so wistful...I also really love the background of trees, vines, and water. Oh, the outdoors! They call to me with a siren song I wouldn't be able to resist if it weren't so very cold outside.

And on that note, I found this gem while perusing Google images for my green umbrella painting.

Source: News on Art
Red poppies, a field, and trees. What more can a girl ask for? 

Well, I hope you all have enjoyed this little survey of impressionism. And no, I am not going to tell you who the artists are. Anything worth knowing is worth searching out. 

And with that bit of wisdom, I bid you all goodbye. I made some pumpkin spice cupcakes for Thanksgiving, and I must go do some quality control...

Sunday, November 20, 2011

Brownies, Nail Polish, and Pride & Prejudice

My best friend and I spent the whole day yesterday baking, painting our nails, and watching Pride and Prejudice. And no, it was not the recent Keira Knightley version, but the wonderful 6-hour BBC version with Colin Firth. Oh, Colin Firth! Even when he looked like he had just sucked a particularly sour lemon (which was for about 90% the movie), he still looked handsome. (Also, after listening to 6 hours of Jane Austen's masterpiece, I'm afraid I picked up the manner of speaking. So please forgive me if I sound like Elizabeth Bennett.)

Anyways, I thought I would share a recipe we made quite spontaneously. We had just finished making a huge batch of pumpkin bread for a party that night, and I thought that it would be really great if we had a few brownies for ourselves (because when ladies get together, you know there is going to be chocolate at some point). But then I thought, what if we had brownies with wine in them? Red wine has such a lovely, rich flavor profile (at least, that's what the descriptions on the labels say) so it would be a nice addition to a simple brownie recipe.

Morgan was all for a little experimentation, so we began our "adventure in baking," as she called it. It was not without troubles, though, because due to an oversight on my part, we had used up all the eggs I had for the pumpkin bread, so we had to make do with a vegan eggless recipe I found on Allrecipes.com. Although the brownies turned out fine, I'm going to recommend using a different recipe because ours were too oily for my healthy sensibilities.


And in case you're wondering, yes, that is Morgan. And yes, that bobblehead is indeed staring creepily at the camera. Pudge sees all!

OK, back to seriousness. You will need cocoa powder, flour, sugar, vanilla, baking powder, salt, eggs, and red wine. My favorite rich red wine is the Yellowtail Pinot Noir. Not only is it the tastiest Pinot Noir I've had, it's also only $5 a bottle. Huzzah!

Mix all the dry ingredients together in a medium bowl, and all the wet ingredients in a separate bowl.


Next, combine all your ingredients in the same bowl and stir until well blended. And try to resist licking your spoon, because that wine makes the batter smell amazing.


Pour into a greased baking pan and bake for 20-25 minutes.


Now you can give in to that urge to lick the spoon. Believe me, that bowl barely needed any scrubbing by the time we were through with it. Mmmmm....brownie batter....

Red Wine Brownies
Adapted from an Allrecipes.com brownie recipe

1/2 cup of your favorite red wine
  • 1 cup white sugar
  • 1 teaspoon vanilla extract
  • 2 eggs
  • 1/2 cup all-purpose flour
  • 1/3 cup unsweetened cocoa powder
  • 1/4 teaspoon baking powder
  • 1/4 teaspoon salt

  1. Preheat oven to 350 degrees. Grease a 9x9 inch baking pan.
  2. In a medium bowl, mix together the wine, sugar, and vanilla. Beat in eggs. Combine flour, cocoa, baking powder, and salt; gradually stir into the egg mixture until well blended. Spread the batter evenly into the prepared pan.
  3. Bake for 20 to 25 minutes, or until the brownie begins to pull away from edges of pan. Let cool on a wire rack before cutting into squares.

I hope this recipe works better than the vegan one. It seemed very similar, so hopefully it will achieve similar results with less oil. And by the way? The brownies made my apartment smell absolutely wonderful. The wine and chocolate melded together to form this tantalizing aroma that still haunts the living room.


Friday, November 11, 2011

My First Flight and Business Trip

So apparently only hicks and small children have never flown on planes, because when I used to mention to people that I have never flown, they usually react with astonishment, confusion, and/or disbelief. Is it really so uncommon to drive everywhere? Seriously.

Anyways, the point of the previous paragraph is that my boss decided that since I had never flown on a plane, I needed to fly to company headquarters to have some training and schmoozing. Was I excited? You bet! Was I afraid of the TSA? Oh, yeah I was. I was so certain they would think I was suspicious and take me away to a small room to be searched. As if anyone would think I could be threatening!

Well, I got to the airport just fine and managed to find the security line with plenty of time to spare. I got into a random line and copied the actions of the lady in front of me. Everything was going fine until I went through the metal detector...and it went off! With no metal on my body, I was extremely confused why the detector would go off. I was trying to remove my Aggie ring and my earrings, and the TSA person was getting annoyed with my confusion, and the line was backing up behind me! AH!

Thankfully the next time I went through, nothing happened. Then I went to the end of the conveyor belt that brought the bins that had my purse and shoes and stuff past the metal detectors, and I guess I took too long to put everything back in order, because the other bins started piling up. And then they started falling off the belt! And the TSA people started coming over! AH!!! So I grabbed my stuff and ran away, hanging my head in shame and muttering, "I'm sorry! I'm sorry! I'm sorry!" Yep, security was terrifying.

The rest of my airport experience was pretty uneventful. I got on the right plane and everything!


And then I started taking pictures of the ground crew. I think all the businesspeople on the flight with me rolled their eyes in tandem at my enthusiasm. Especially since we had gotten on the plane before the sun was up.


I said farewell to my home. And yes, my side was on the same side as the rising sun. That's why there's so few pictures of the flight up to Tulsa. 


Well, I made it to Tulsa just fine and got to my hotel room. Boy, was I surprised! I'm used to Motel 6 when I travel. This was SOOOO nice! See that TV? Yeah, it was HUGE. I spent my evening curled up on the squishy couch under a nice warm blanket watching Blue Ocean. Oh yeah! I even got to see a lovely sunset outside my window.


About Tulsa: I like it! It's super pretty! There's so many trees, and cute little hills, and even some cute little mini-mountains! (Tulsa people call them Turkey Mountains, but they are actually very nice. Even if they are rather small.) I think I amused my coworkers at HQ, because I kept saying how "adorable" Tulsa is. The part of town I was in was rather quaint, with nice little buildings that remind me of New England architectural styles, and did I mention the trees? They were already changing color. Yes, I was very excited about the plethora of trees in the city. Can you tell I grew up in West Texas?


My experience in Tulsa International Airport was much better than my original departure! I went right through security with no mishaps or annoyed TSA people, and had plenty of time to eat some delicious frozen custard and enjoy the new Francine Rivers book. (By the way, it is really good!)


Well, it was rather overcast the day I left Tulsa, so I thought it would be a dull plane ride back. Looks really boring, right? You can barely see the ground for the rain. 

You can imagine my surprise when all of the sudden the view outside my window was completely white! We were going into the clouds, so I couldn't see anything at all. And then, all of a sudden...


BOOM!! We broke through the clouds, and there was the most beautiful blue sky above them! It seems kind of silly, but I guess I just thought rainclouds went high enough into the atmosphere that we would be stuck in them the whole time. Boy, was I ever wrong! 

There is a cloudy wonderland up there! Sometimes it felt like we were flying over the Antarctic, sometimes like we were flying over some magical Narnia-like land made of white fluffy stuff. Either way, I was enchanted the whole way home. 


See? Antarctica! Or possibly Narnia.

Far too soon, it was time to get off the plane and go home. But I will be back, airplanes. Oh, I will be back.